LIGHTING YOUR PUTZ!

I am hearing from so many folks this year (2008) having troubles with the
electrical side of putzing,
that is - LIGHTING THEM UP! This is nothing new, believe me: 't-was ever thus!
There are many ways of doing it.
This is the way I do it.
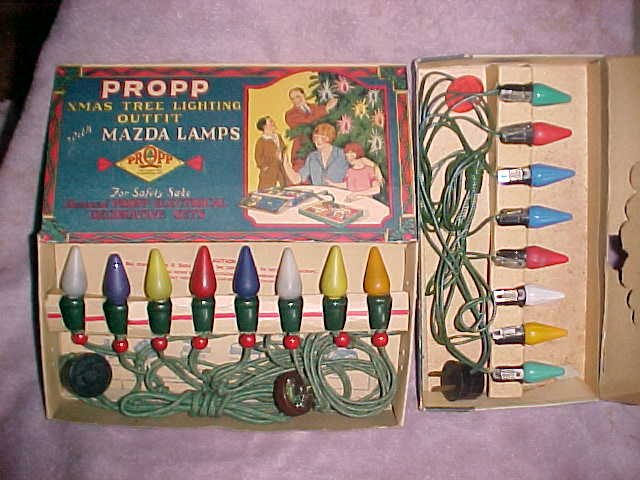
Here are two vintage "new in the box" series C-6 light strings. Each 15-volt bulb was
like a link in a chain; they divided the 120-volt house current equally across each
bulb, 8 X 15 adding up to 120. However, if "one went out they all went out." The chain
was broken. It was the Christmas light lament for 50 years, and I have a dozen
vintage "Rube Goldberg" gadgets in my collection to help you single out the culprit. The set on the
left dates from the early(1923)-to-later 1920s - the one on the right as late as the mid-60s.
This type of set was the mainstay of Christmas tree lighting for half a century, and
accounts for why sets of houses and so many other old Christmas artifacts came in sets
of 8. Billions were sold. When you find them like this, you will pay a pretty penny and
you don't buy them to use them.
You buy them to keep them as they are.
However ...
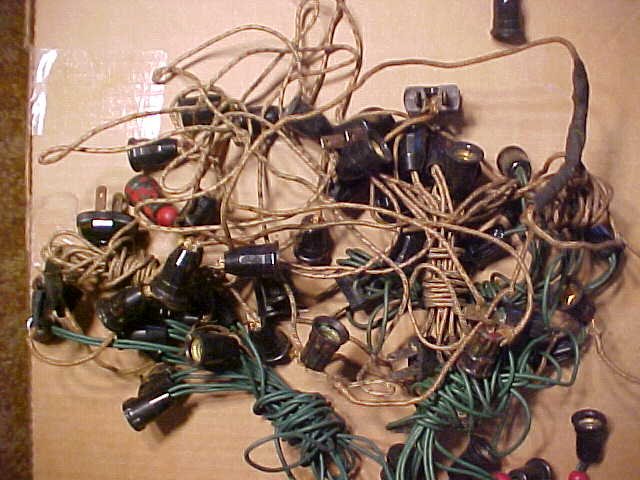
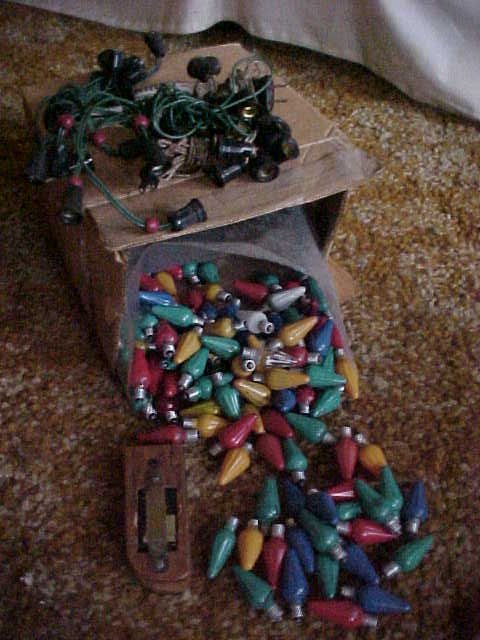
- you mostly find them THIS way! Boxes long gone. Sometimes with some bulbs,
other times no. Frayed wires, gummed up with friction tape, scotch tape - even
bandaids! Sockets missing. Wires broken. A
spaghetti-plate jumble in a junky flea-market box. Christmas tree fires guaranteed! This
way they are cheap, and for
years I bought every one I could find. I once got half a bushel for a dollar. Reason?
- to salvage the SOCKETS!.
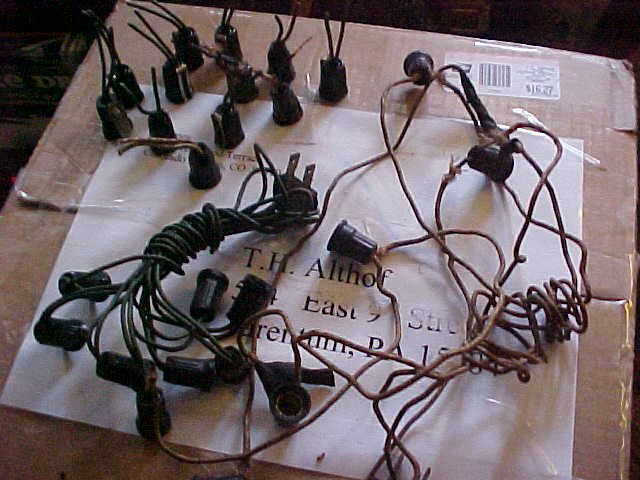
The low-voltage C-6 sockets used to be available in hardware and electrical stores just
about everywhere, but not anymore. When you do find them, they're expensive! Here you see
the two types of old strings you'll come across. Cloth covered and plastic. The cloth-covered
are typical of the prewar period - the plastic postwar. That one on the right is what's
left of a "Clemco" Great Depression classic: woven fabric over natural rubber. They are the
worst, but it's not the wires that went bad - it's the insulation. That old rubber dried
out and crumbled and the fabric frayed exposing the bare copper. The sockets themselves
are of a better, more rugged quality than the
postwar, but the wire insulation is the pits. You usually have to pull it off and
replace it with shrink tubing.
The postwar plastic is often still viable, and if still pliable,you can
use it as-is. I wouldn't be afraid to fill the sockets of the postwar string on the
left and plug it in. In fact, I don't tear up intact strings. I use these lights on my
tree. I add a socket or two from a broken string to a good one to make the bulbs run
cooler and last a long long time. Some early sets had nine and had they continued this,
the burned out bulb thing would have been an almost non-existent problem. You will find
some plastic strings with nine. Those were from sets of bubble lights. I run 11 on a C-6
bubble light string. Slightly dimmer, but still bubble fine. And they just last forever.
In the background you can see some sockets salvaged from old strings. I
leave about a 2 inch pigtail of each of the two wires coming out of them. Just toss the
old lengths of wire leftover. They're worthless. But now you have a supply of sockets on hand.
I keep mine in an old plastic mayonnaise jar.
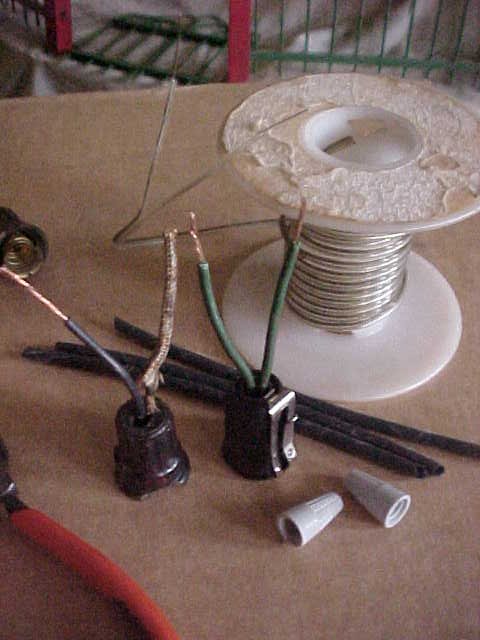
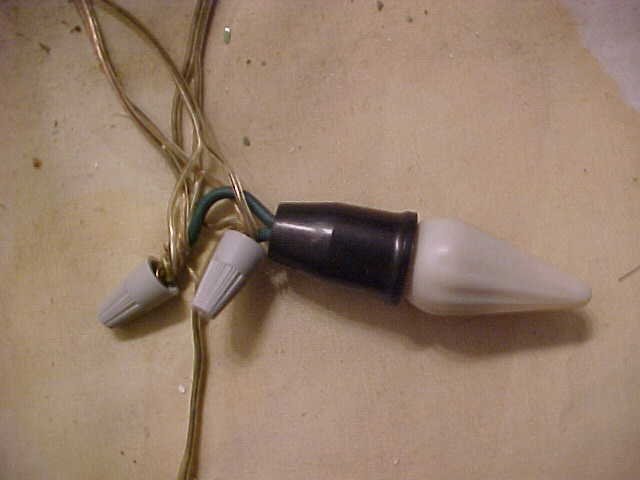
We're really getting down to it now. The socket on the left is a prewar with the cloth.
I have replaced the rotten wire insulation on the left wire with a piece of 1/8 inch
shrink-tubing, some pieces of which you can see behind the sockets. I twisted the copper
strands of wire CLOCKWISE to keep them neat, first - then slid the pre-cut
length of shrink tubing down to the very bottom, heated it with a match until it shrunk
down skin tight. Neat stuff, that shrink tubing! Always twist the wire strands
clockwise. The reason is clear. Those little gray conical objects in
the lower right are plastic wire nuts and they screw on clockwise. The
socket on the right is postwar and the insulation was still supple and good, so
I left
it "as-is." On both sockets you can see I have stripped about 1/2 inch of the wire
bare for making
connections. The connection from one socket to the next will be made via that
spool of
wire you see in the backbround. That's what's left of my spool of Radio Shack
#278.1509 two-conductor #24 gauge solid speaker wire. It's still available at
$3.99 for a 75 foot spool.
Here you see the illumination of my "Courthouse" in Downtown current putz. Radio Shack
speaker wires come to it and lead off from it to other sockets which light other houses.
The wires are twisted over each other clockwise and then the small-sized "wire
nuts" screwed clockwise over the connection to prevent short circuits.
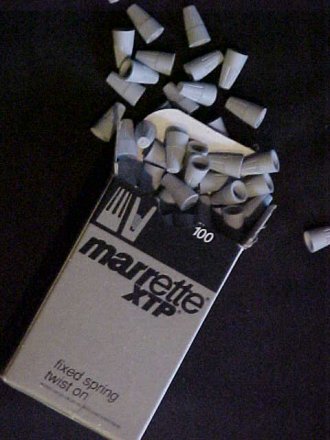
WIRE NUTS come in a wide range of sizes. You might need several of the
smaller sizes. I could use some one size larger. The more wires you twist
togther, the larger the nut you'll need. Get 'em at electrical
supply shops, hardware stores, automotive stores. Look for places where you
don't have
to buy an assortment containing mostly sizes you will never need. I bought this
box of 100 of the next-to-smallest size years ago, and they do for most situations. They are
5/8 inch long.The box says I paid $2.75. When you find 'em available this way - stock up!

A more distant view. You can see the Radio Shack speaker wires going off in several
directions. I wish it were white. It is clear and that's better than some stark color
- but it is small and can be concealed. The thing about this method is that the cheap
speaker wire is the expendable and variable item here. You can cut it to exactly what
you need to get from one feature to another. No factory-made string of lights has ever
been able to meet that requirement.
All of this leads one speaker wire to an old train transformer that powers the system
at 15 volts or less. I generally run about 10 volts.
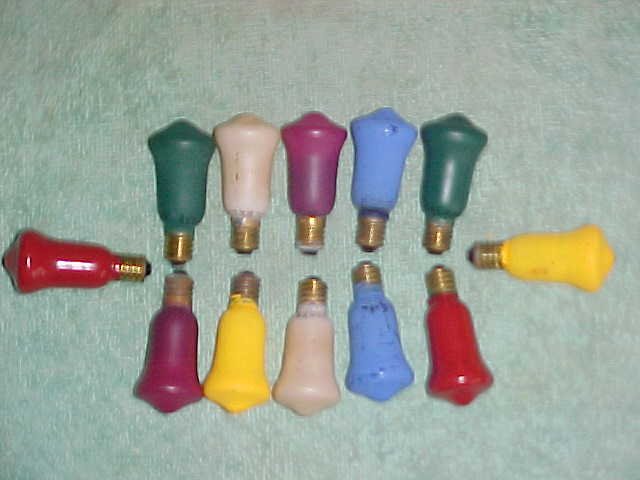
And , finally - the bulbs are still there, too. These are my cheap-and-cheesy ones to
burn. They have aluminum bases -post 1950. I save my old brass-based pre-wars for better things.
In the lower left you may be able to make out my pocket tester. I came up with it years ago
because I needed something quick and simple to check lights at flea-markets without a
lot of wires and complications. With it I can go through a shoebox full of lights in
minutes. These are all good. If I don't want color, I can strip the paint. If you dim
them with a train transformer they will last indefinitely.
It wouldn't take you more than 4 or 5 ratty old light strings to lay in a sufficient
supply of sockets, and you can untwist them from the speaker wires and use them over
and over. There are 17 on my current layout. I initially saw this as a very temporary
hookup - no soldering - but golly they're still working after 15 years! The main thing
that happens is the bulbs will occasionally wiggle loose - just as they did on the
Christmas tree - and you have to give them a twist. But since we've got these hooked
up in parallel , only that one bulb will be dark and you can go right to it.
I run my
lighting system at about 10 volts out of an old Lionel type "T" transformer and none
of the bulbs has ever burned out. These C-6 sockets also fit the train type bulbs that
you are using in your vintage lamposts in case you haven't found enough of the old cones.
Conversely, I often use the cone bulbs in my big old passenger cars and other train
items. They are the same voltage and current and everything. Lots of people did that
in the old days, too. I have often found old Christmas bulbs in old train cars even some
rare ones. I rediscovered my beloved "Mazda Bells" that way.
1934-'41 C-6 GE-Mazda Bells. Always searching ...
So - your assigment is - go out next summer and buy up all the junk C-6 strands and bulbs
you can. You could probably find some in junk and 2nd hand shops right now. Good Will,
Saint Vincent DePaul, and Salvation Army stores have been good sources for me in
Christmases past.
Good Hunting!
By the way - in case the hunting isn't good, the link below will
take you
to a company that can supply every kind of miniature bulb - and even the sockets - that
you could ever need for trains and everything I've discussed above:
AUTOLUMINATION


For information about this site, please contact us at:
http://cardboardchristmas.com/papateds/contact.htm
Copyright 2000-2012 Theodore H. Althof,Jr.Except where noted, the contents of this website and all it's pages and submissions therein contained are the intellectual property of Theodore H.Althof,Jr. All rights are reserved. (Background musical selections are,of course, excepted.)
|
announcements, will remain exactly as Ted left it in October, 2012. The archive is kept online with the help of volunteers from:
|